If you can't see the file above, an image of my case study is below :)
end
Group work
https://www.figma.com/file/xgDNuYIlpL9XdVAFD3x8WR/Garden-Booking-App-Personas-and-User-Flow?type=whiteboard&t=Cta6nWVmKqMrm0bx-1
Garden Booking App
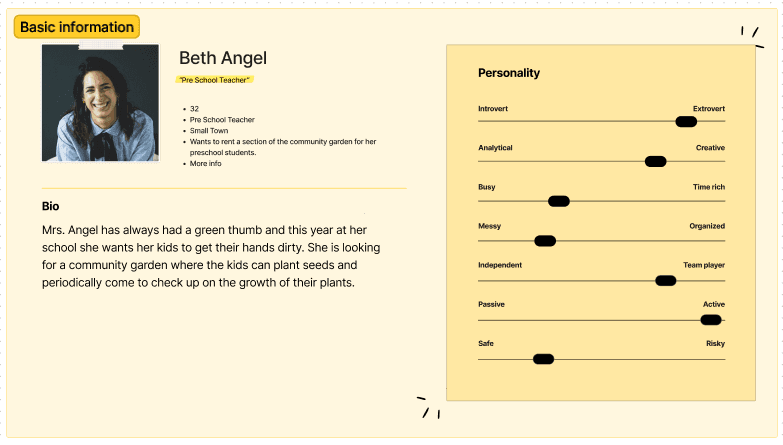
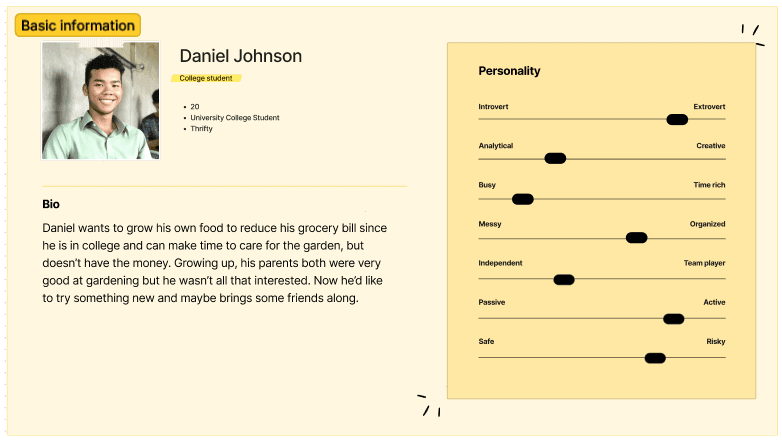
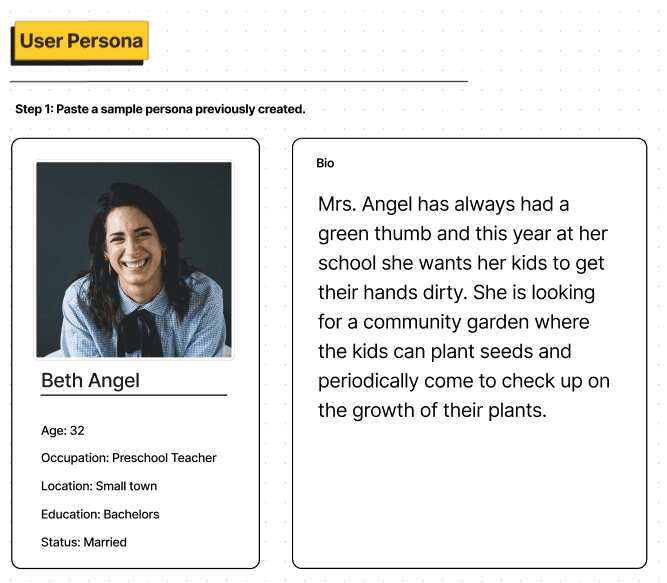
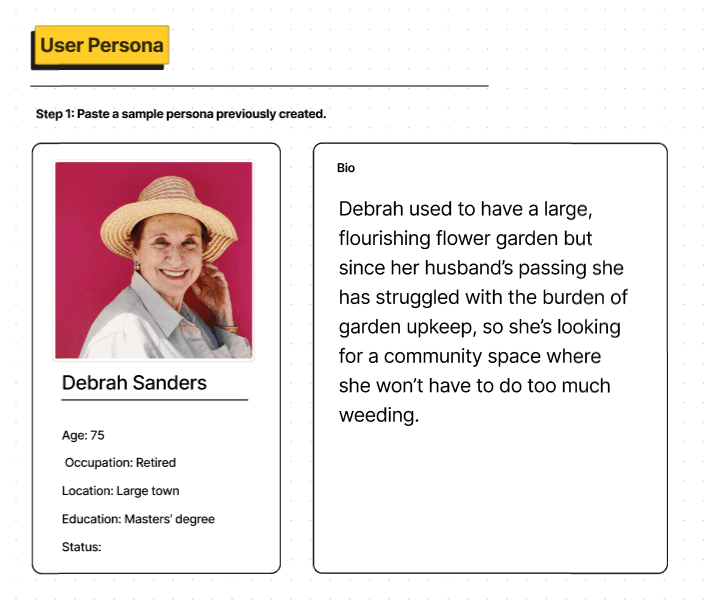
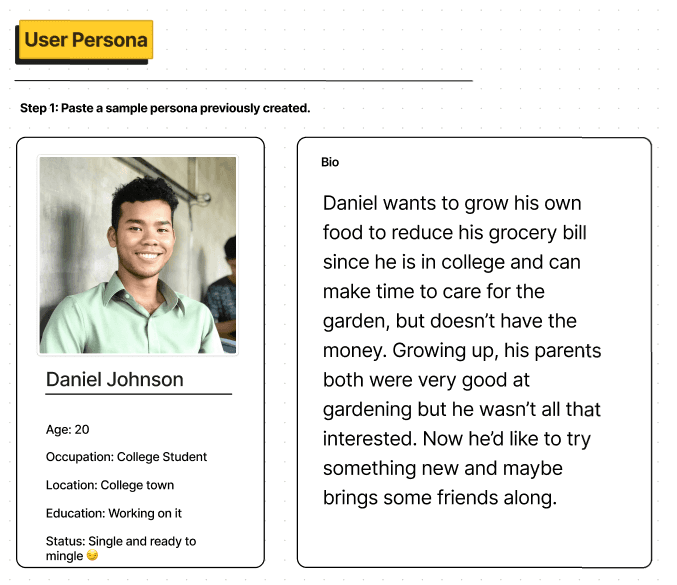
Personas
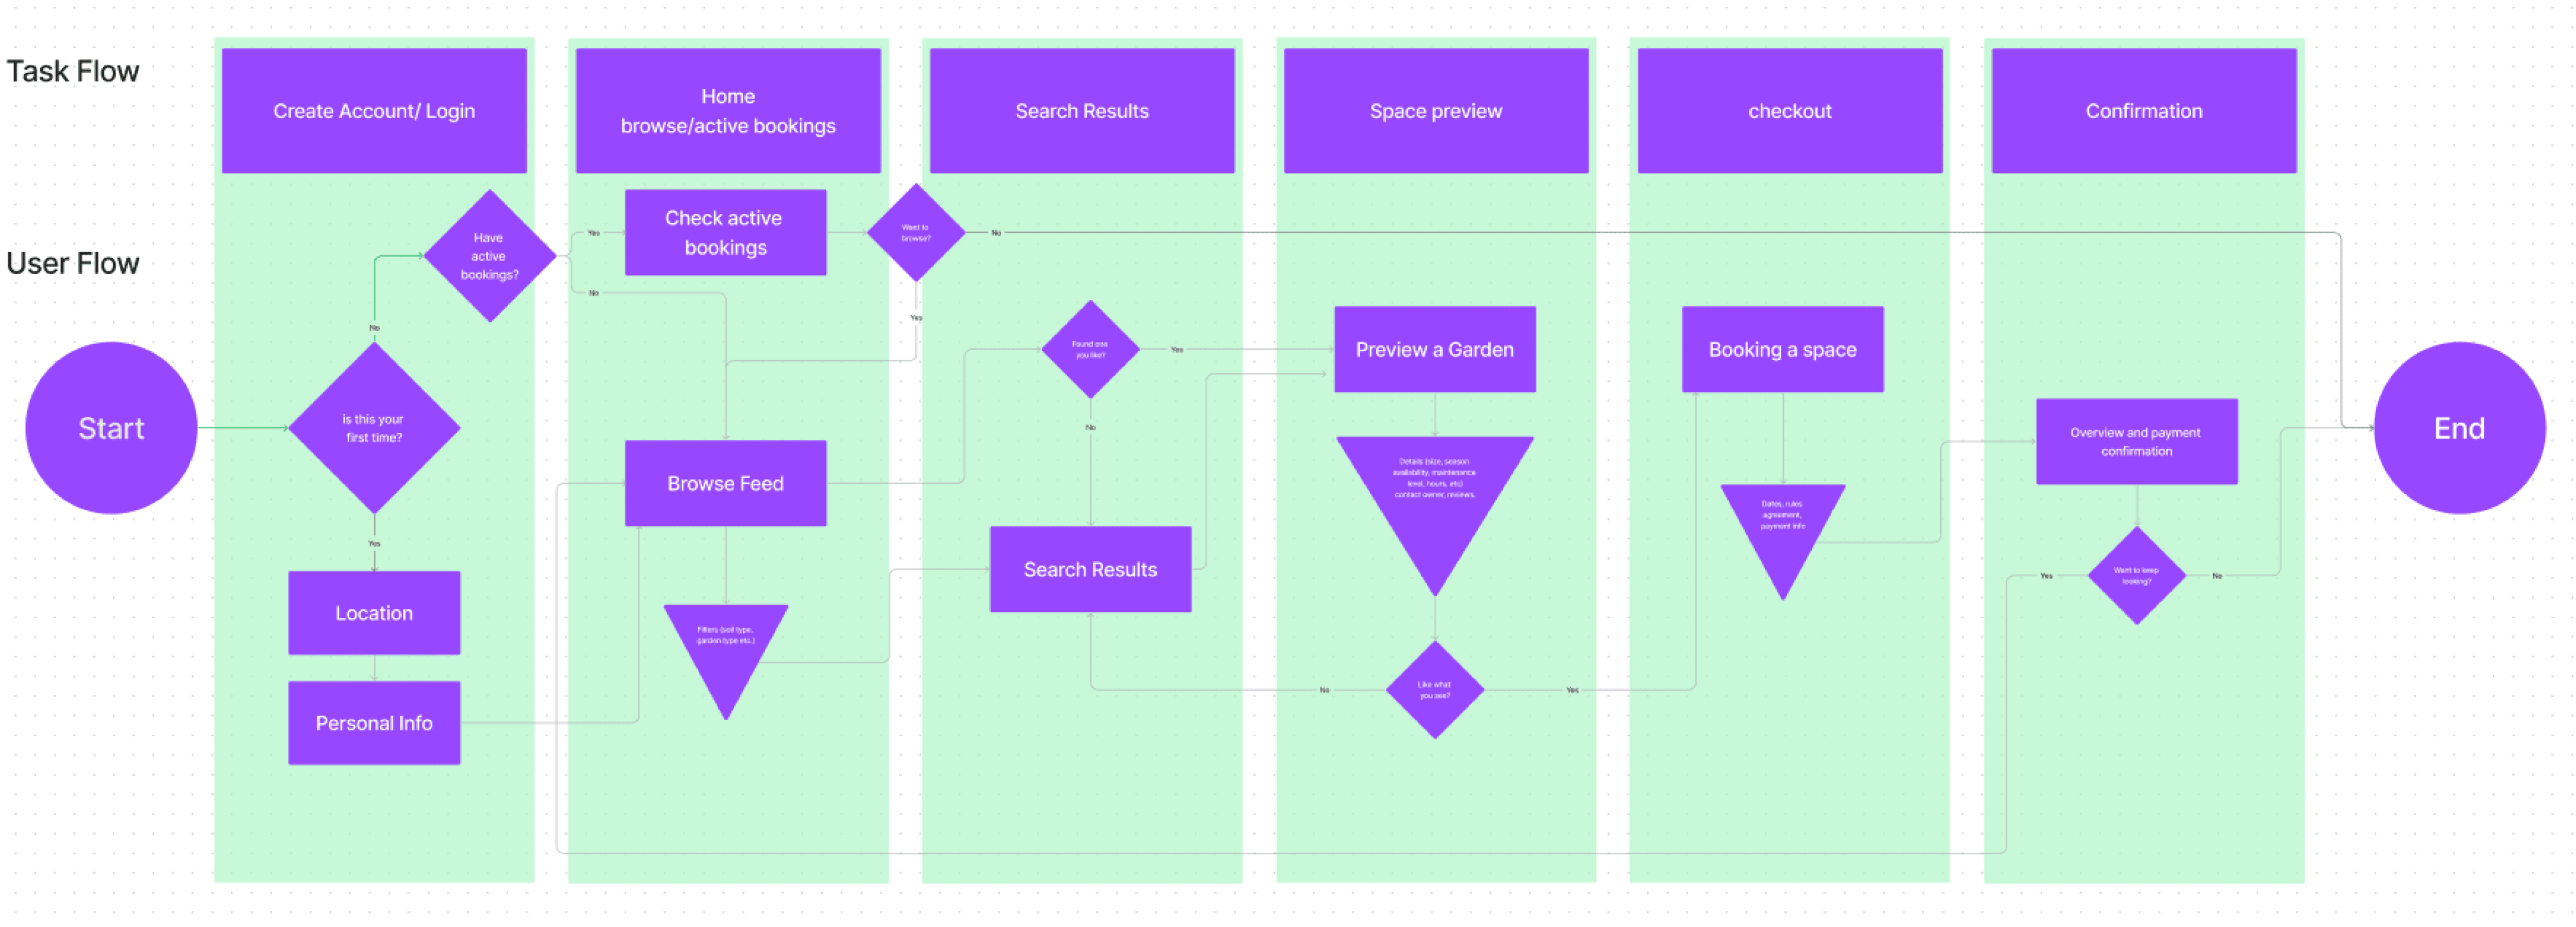
User Flow
What I learned
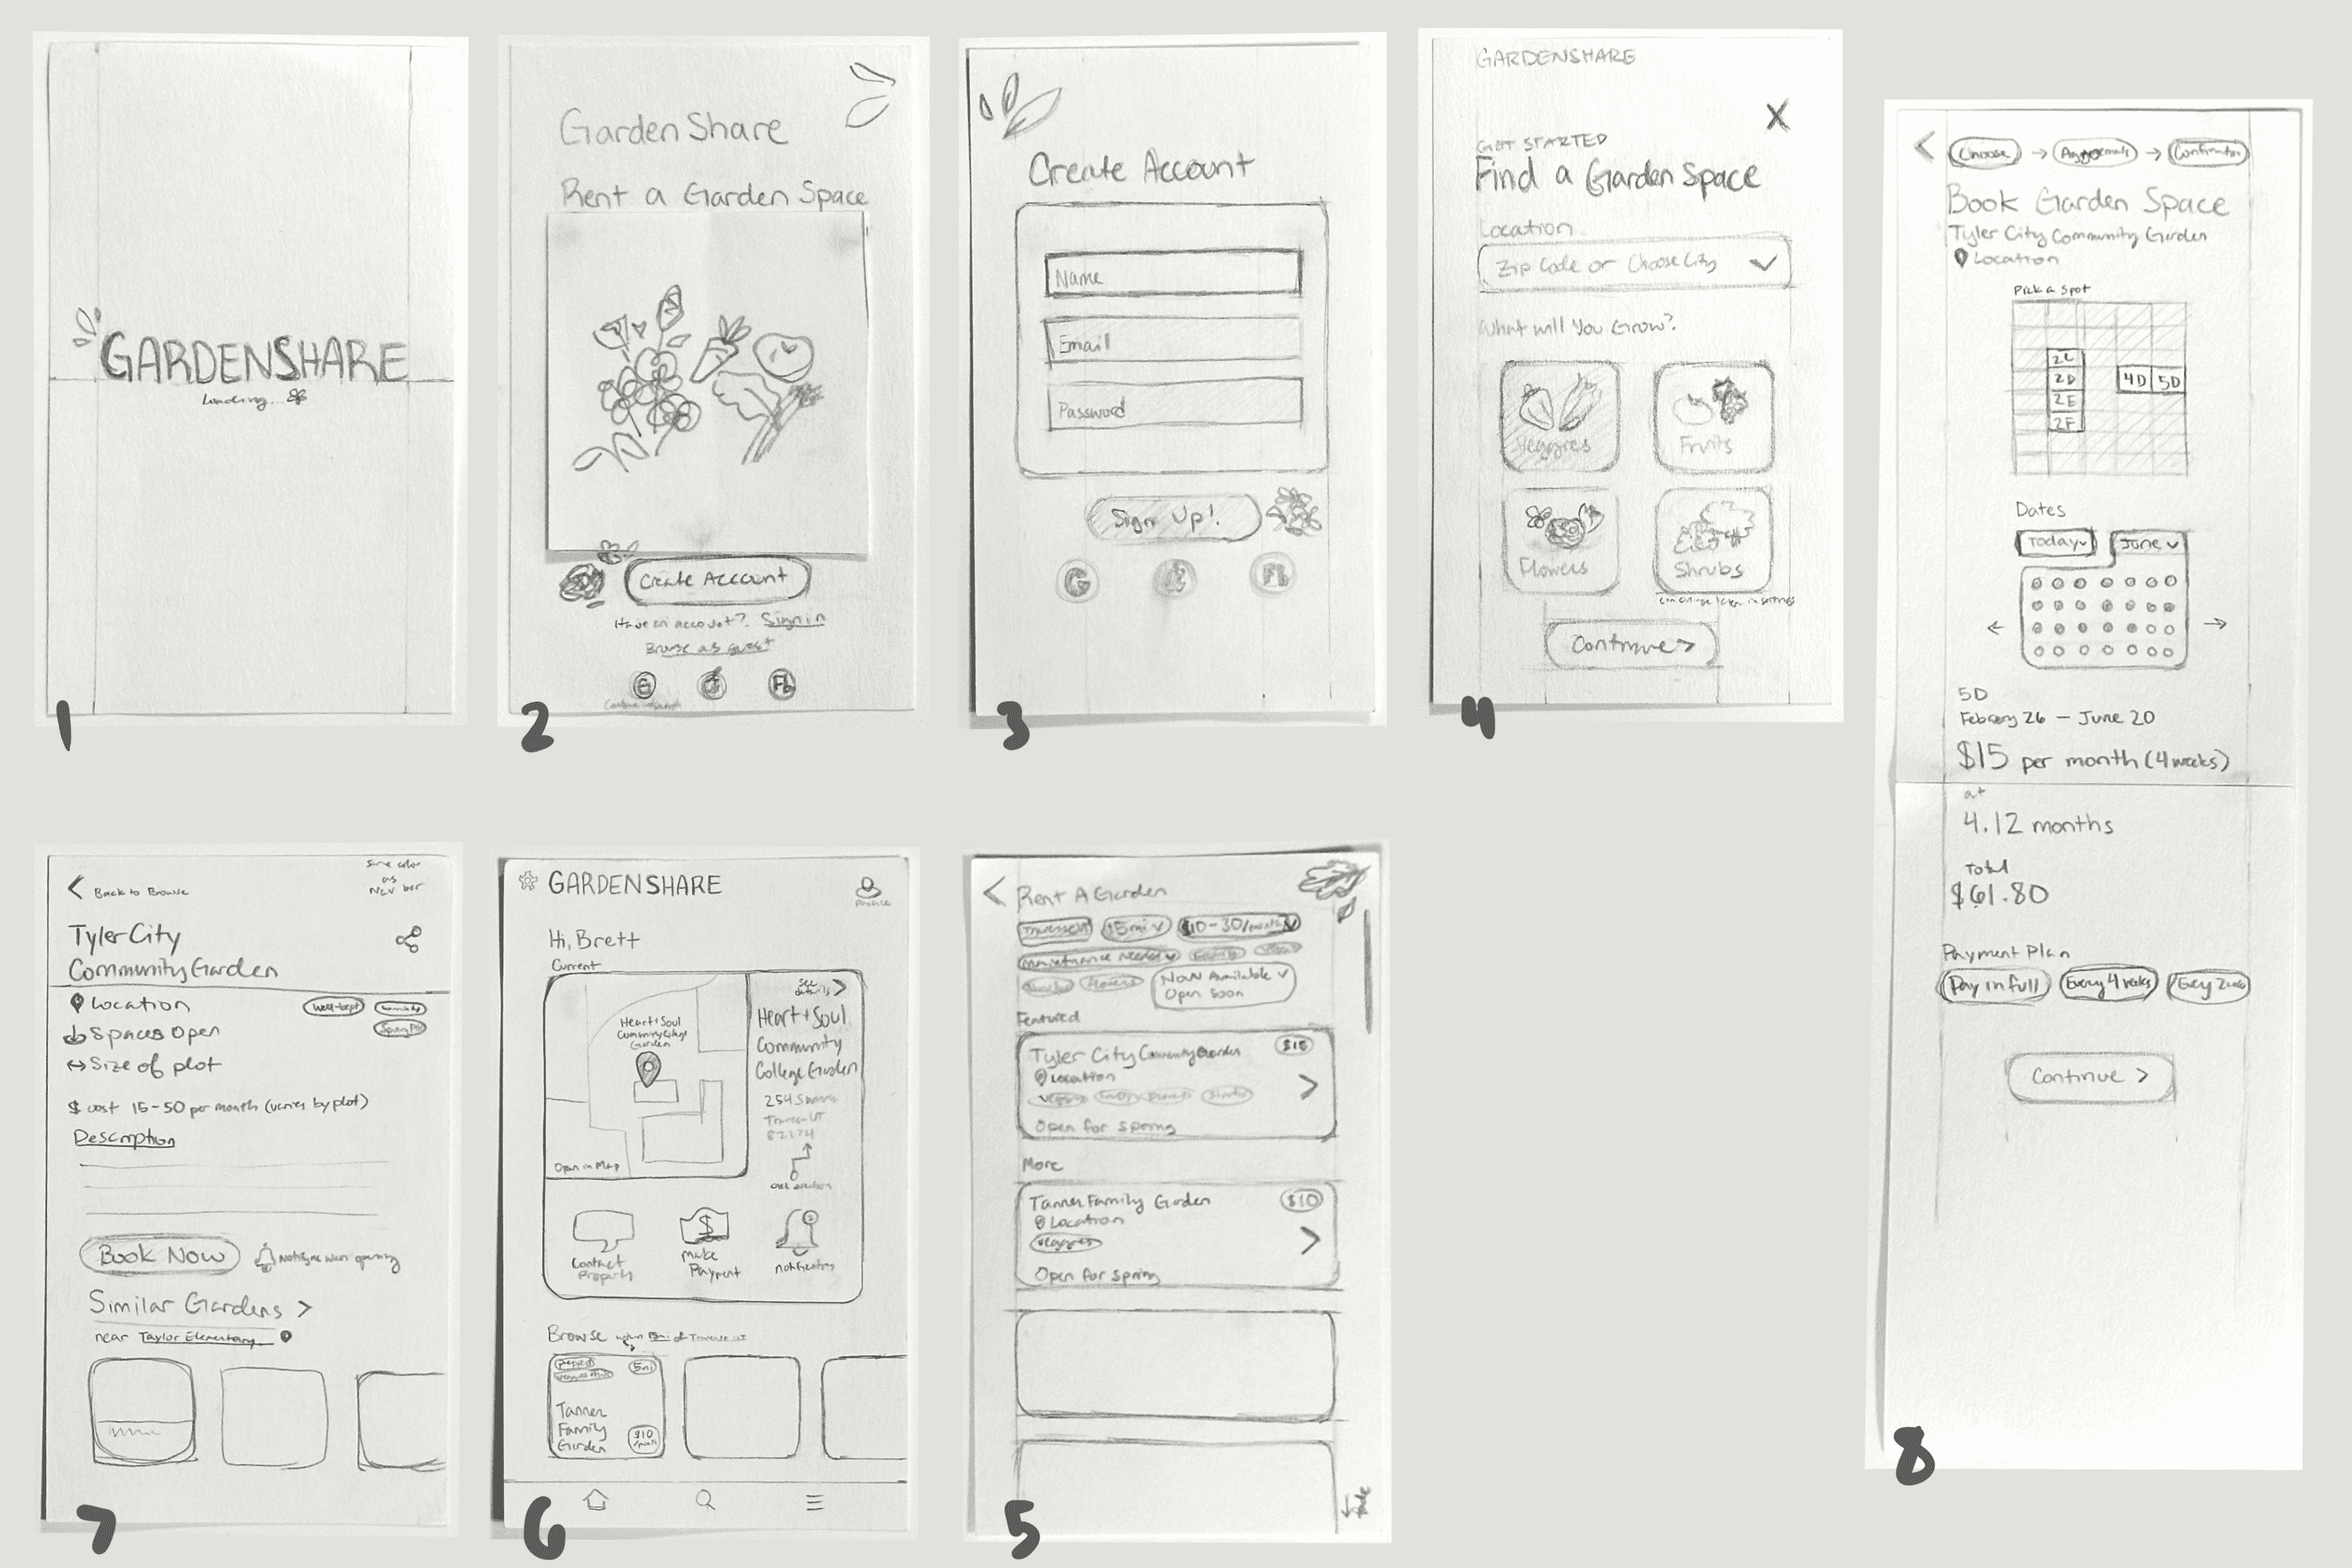
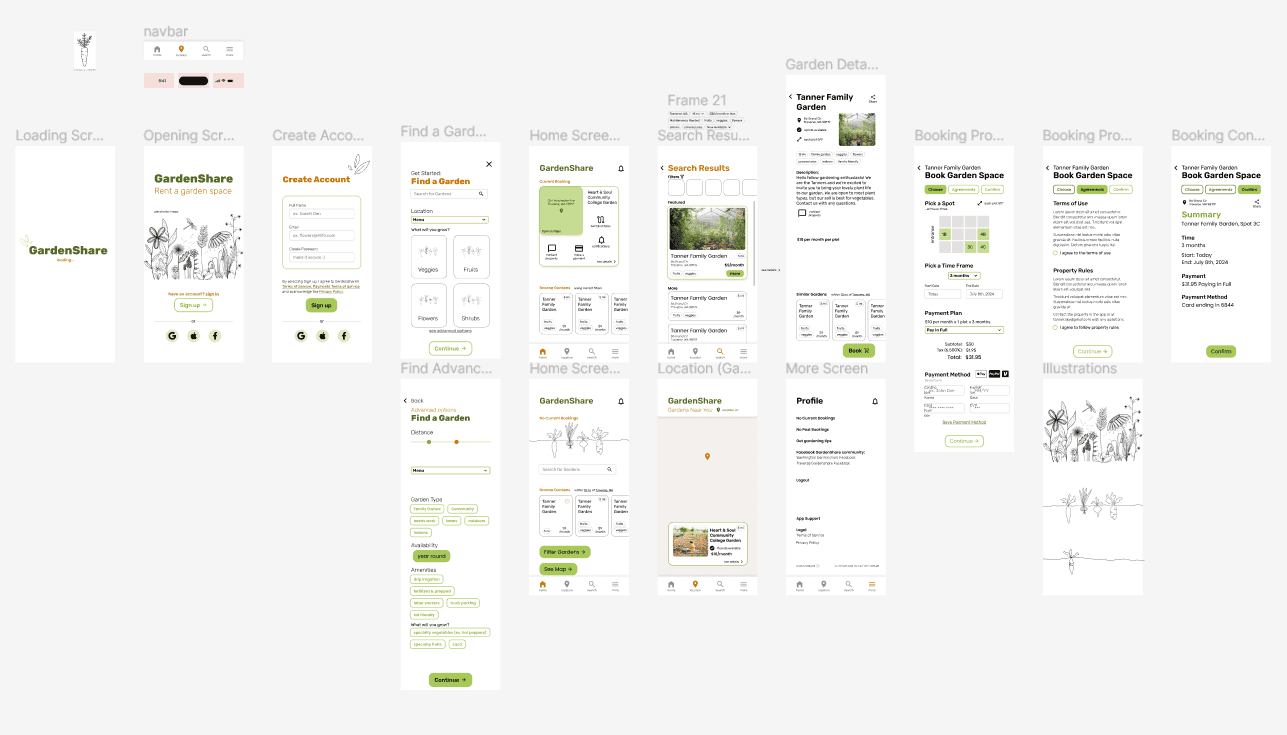
Paper Wireframing
User Interface Design Case Study
Click image above to view project
Click any image to view project
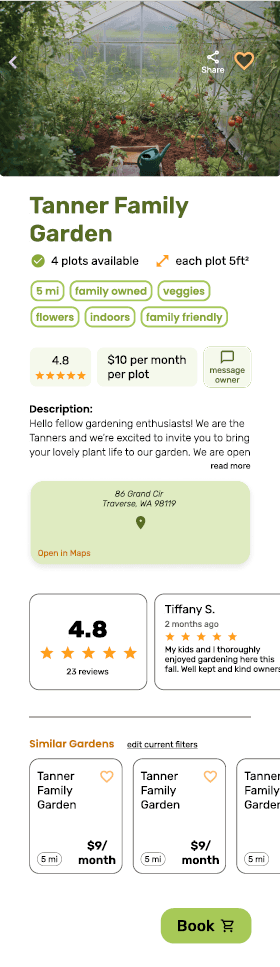
The goal of this project is to create a design system for a consistent design in a project. I created a booking app for renting garden spaces,
This project showcases my design skills so far and how I am growing as a designer.
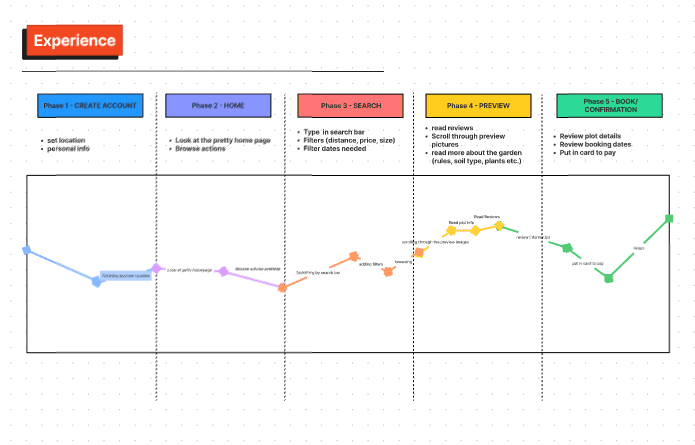
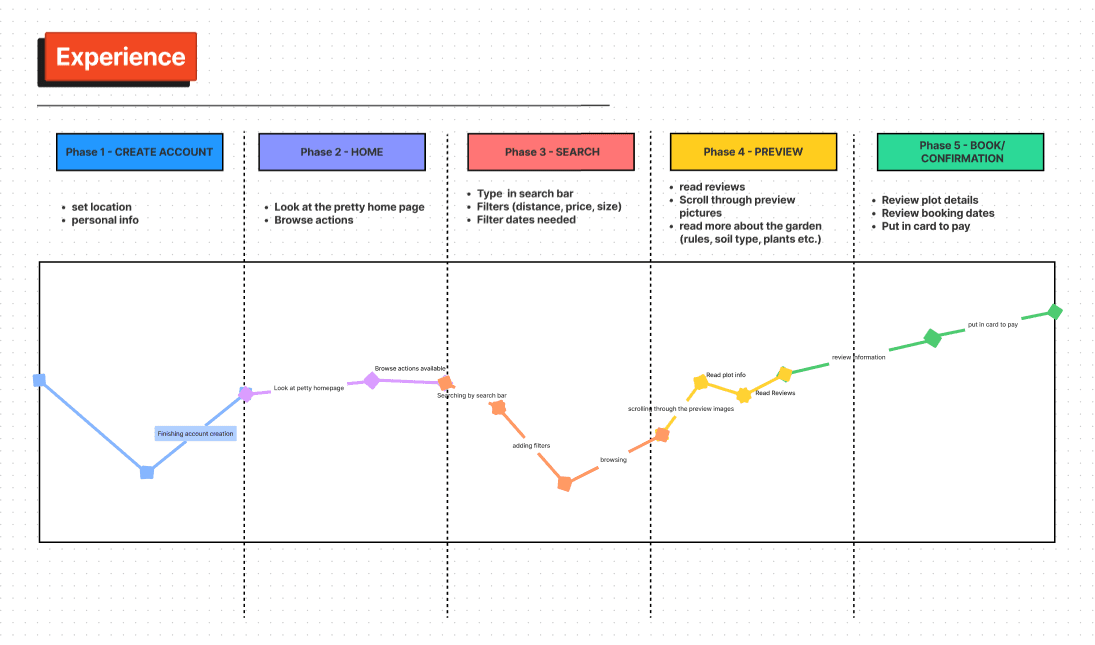
Journey Map
click link below to view all group work

What I learned
What I learned
I learned to focus on ease of booking experience for users, and creating these personas helped guide where to start.
https://www.figma.com/file/xgDNuYIlpL9XdVAFD3x8WR/Garden-Booking-App-Personas-and-User-Flow?type=whiteboard&t=Cta6nWVmKqMrm0bx-1
click link below to view the journey map more easily:
I discovered that there are a lot of screens that will need to be made to make the booking process clear, and that there are a few bits of information that need to be seen during nearly the whole process. I changed how many screens I would need, reemphasized cohesiveness in design and smoothed out what was necessary to the design.
This is how a user might interact with the app.
Overview
Individual work
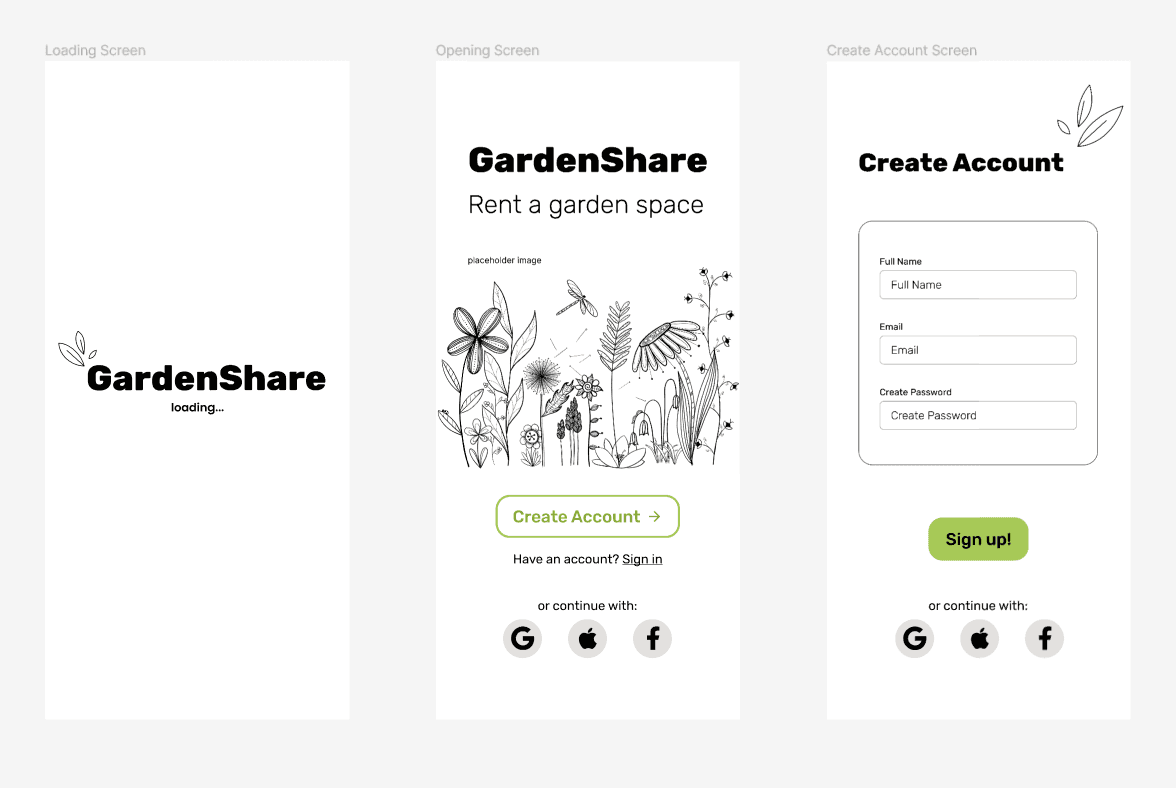
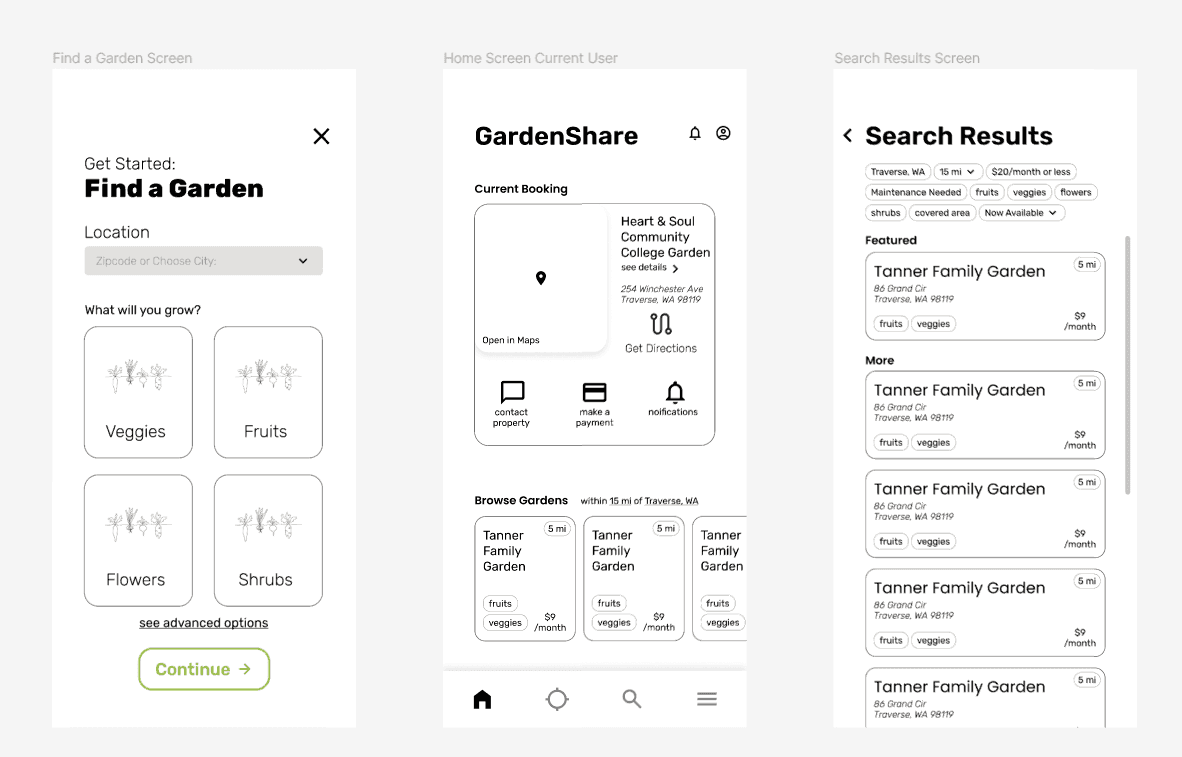
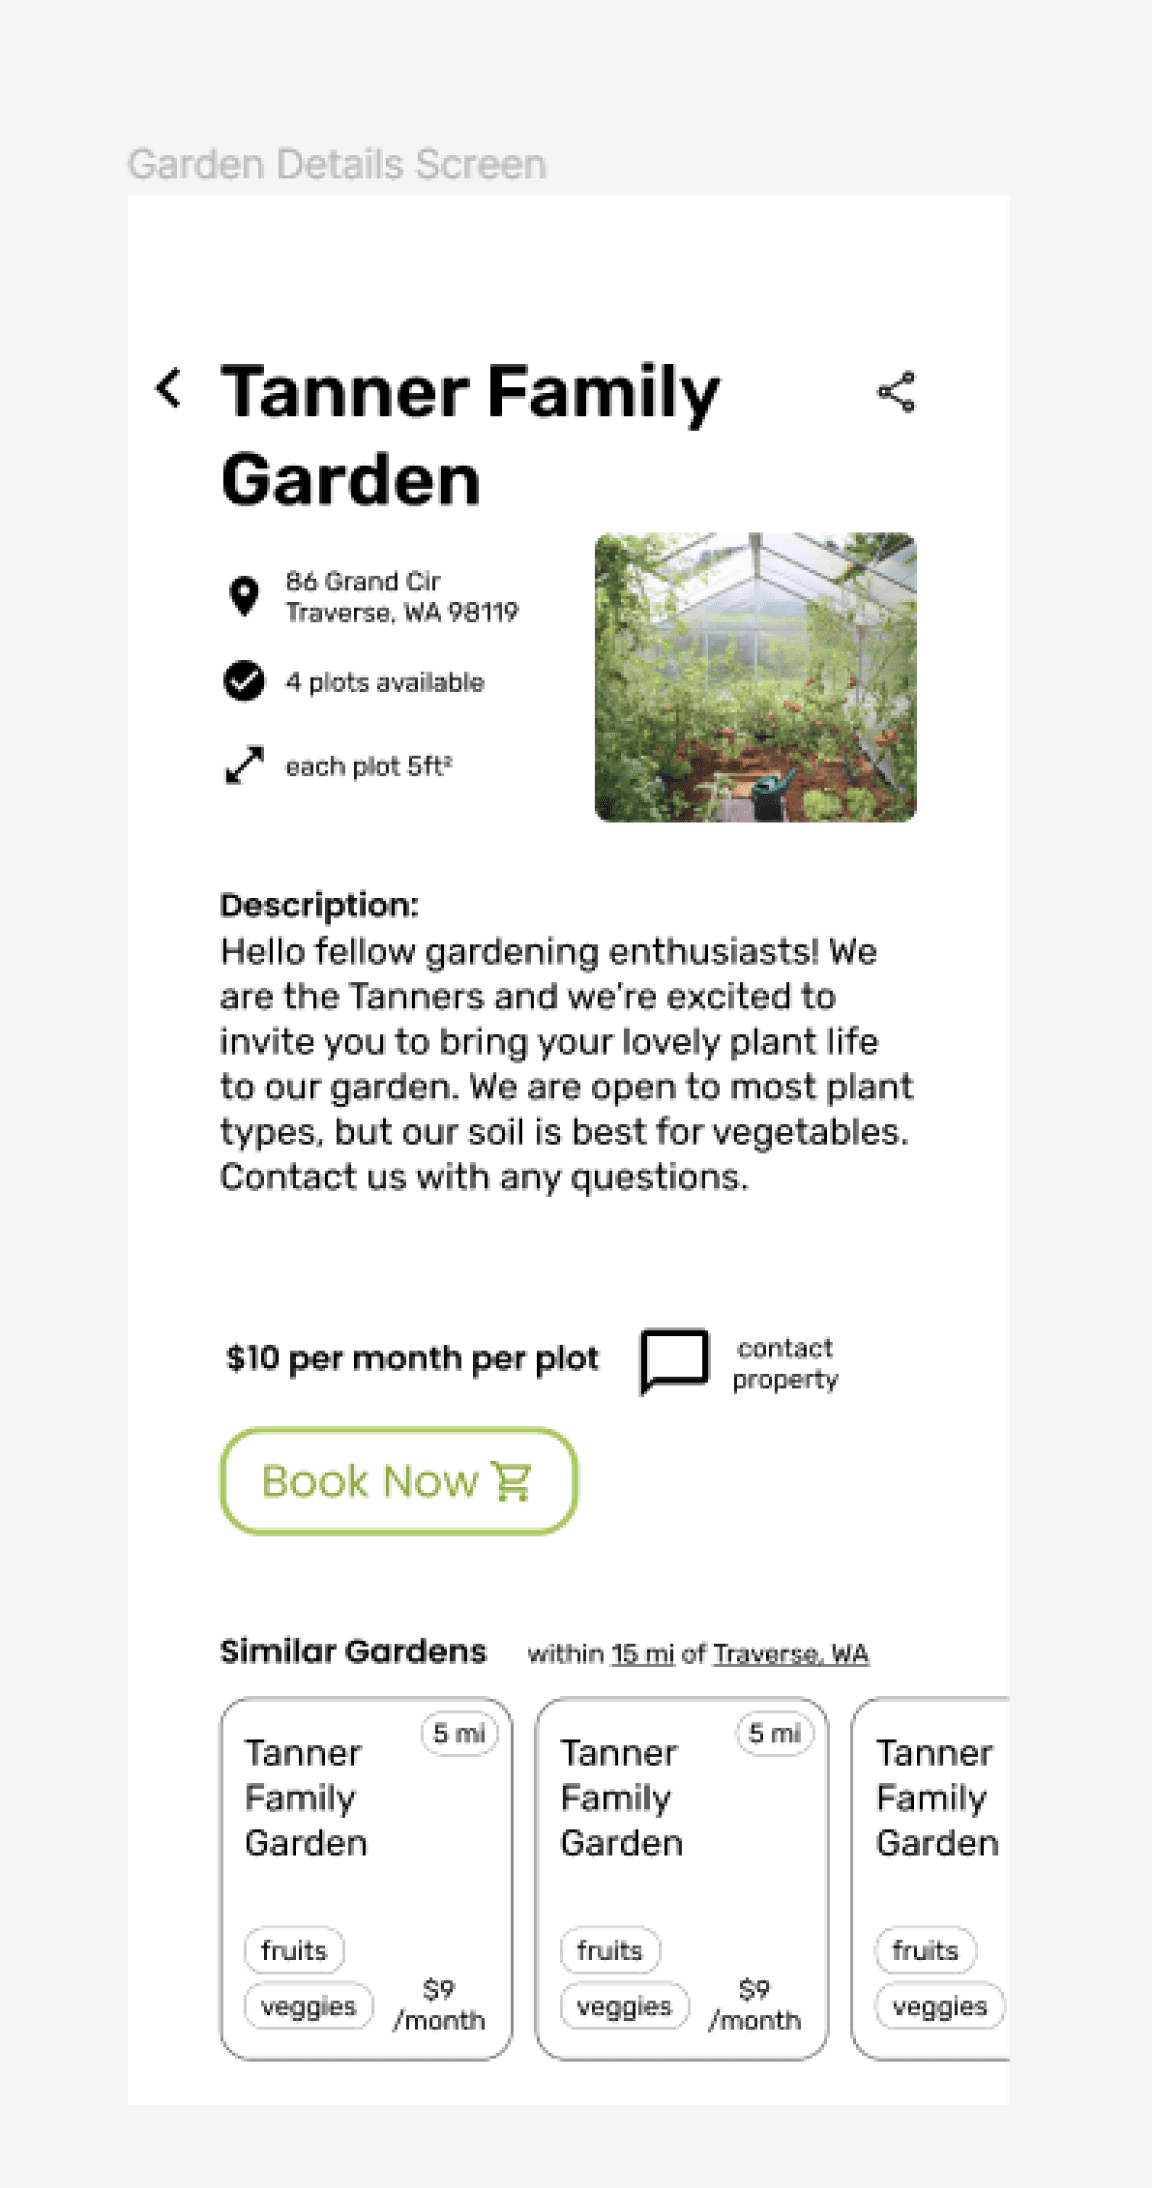
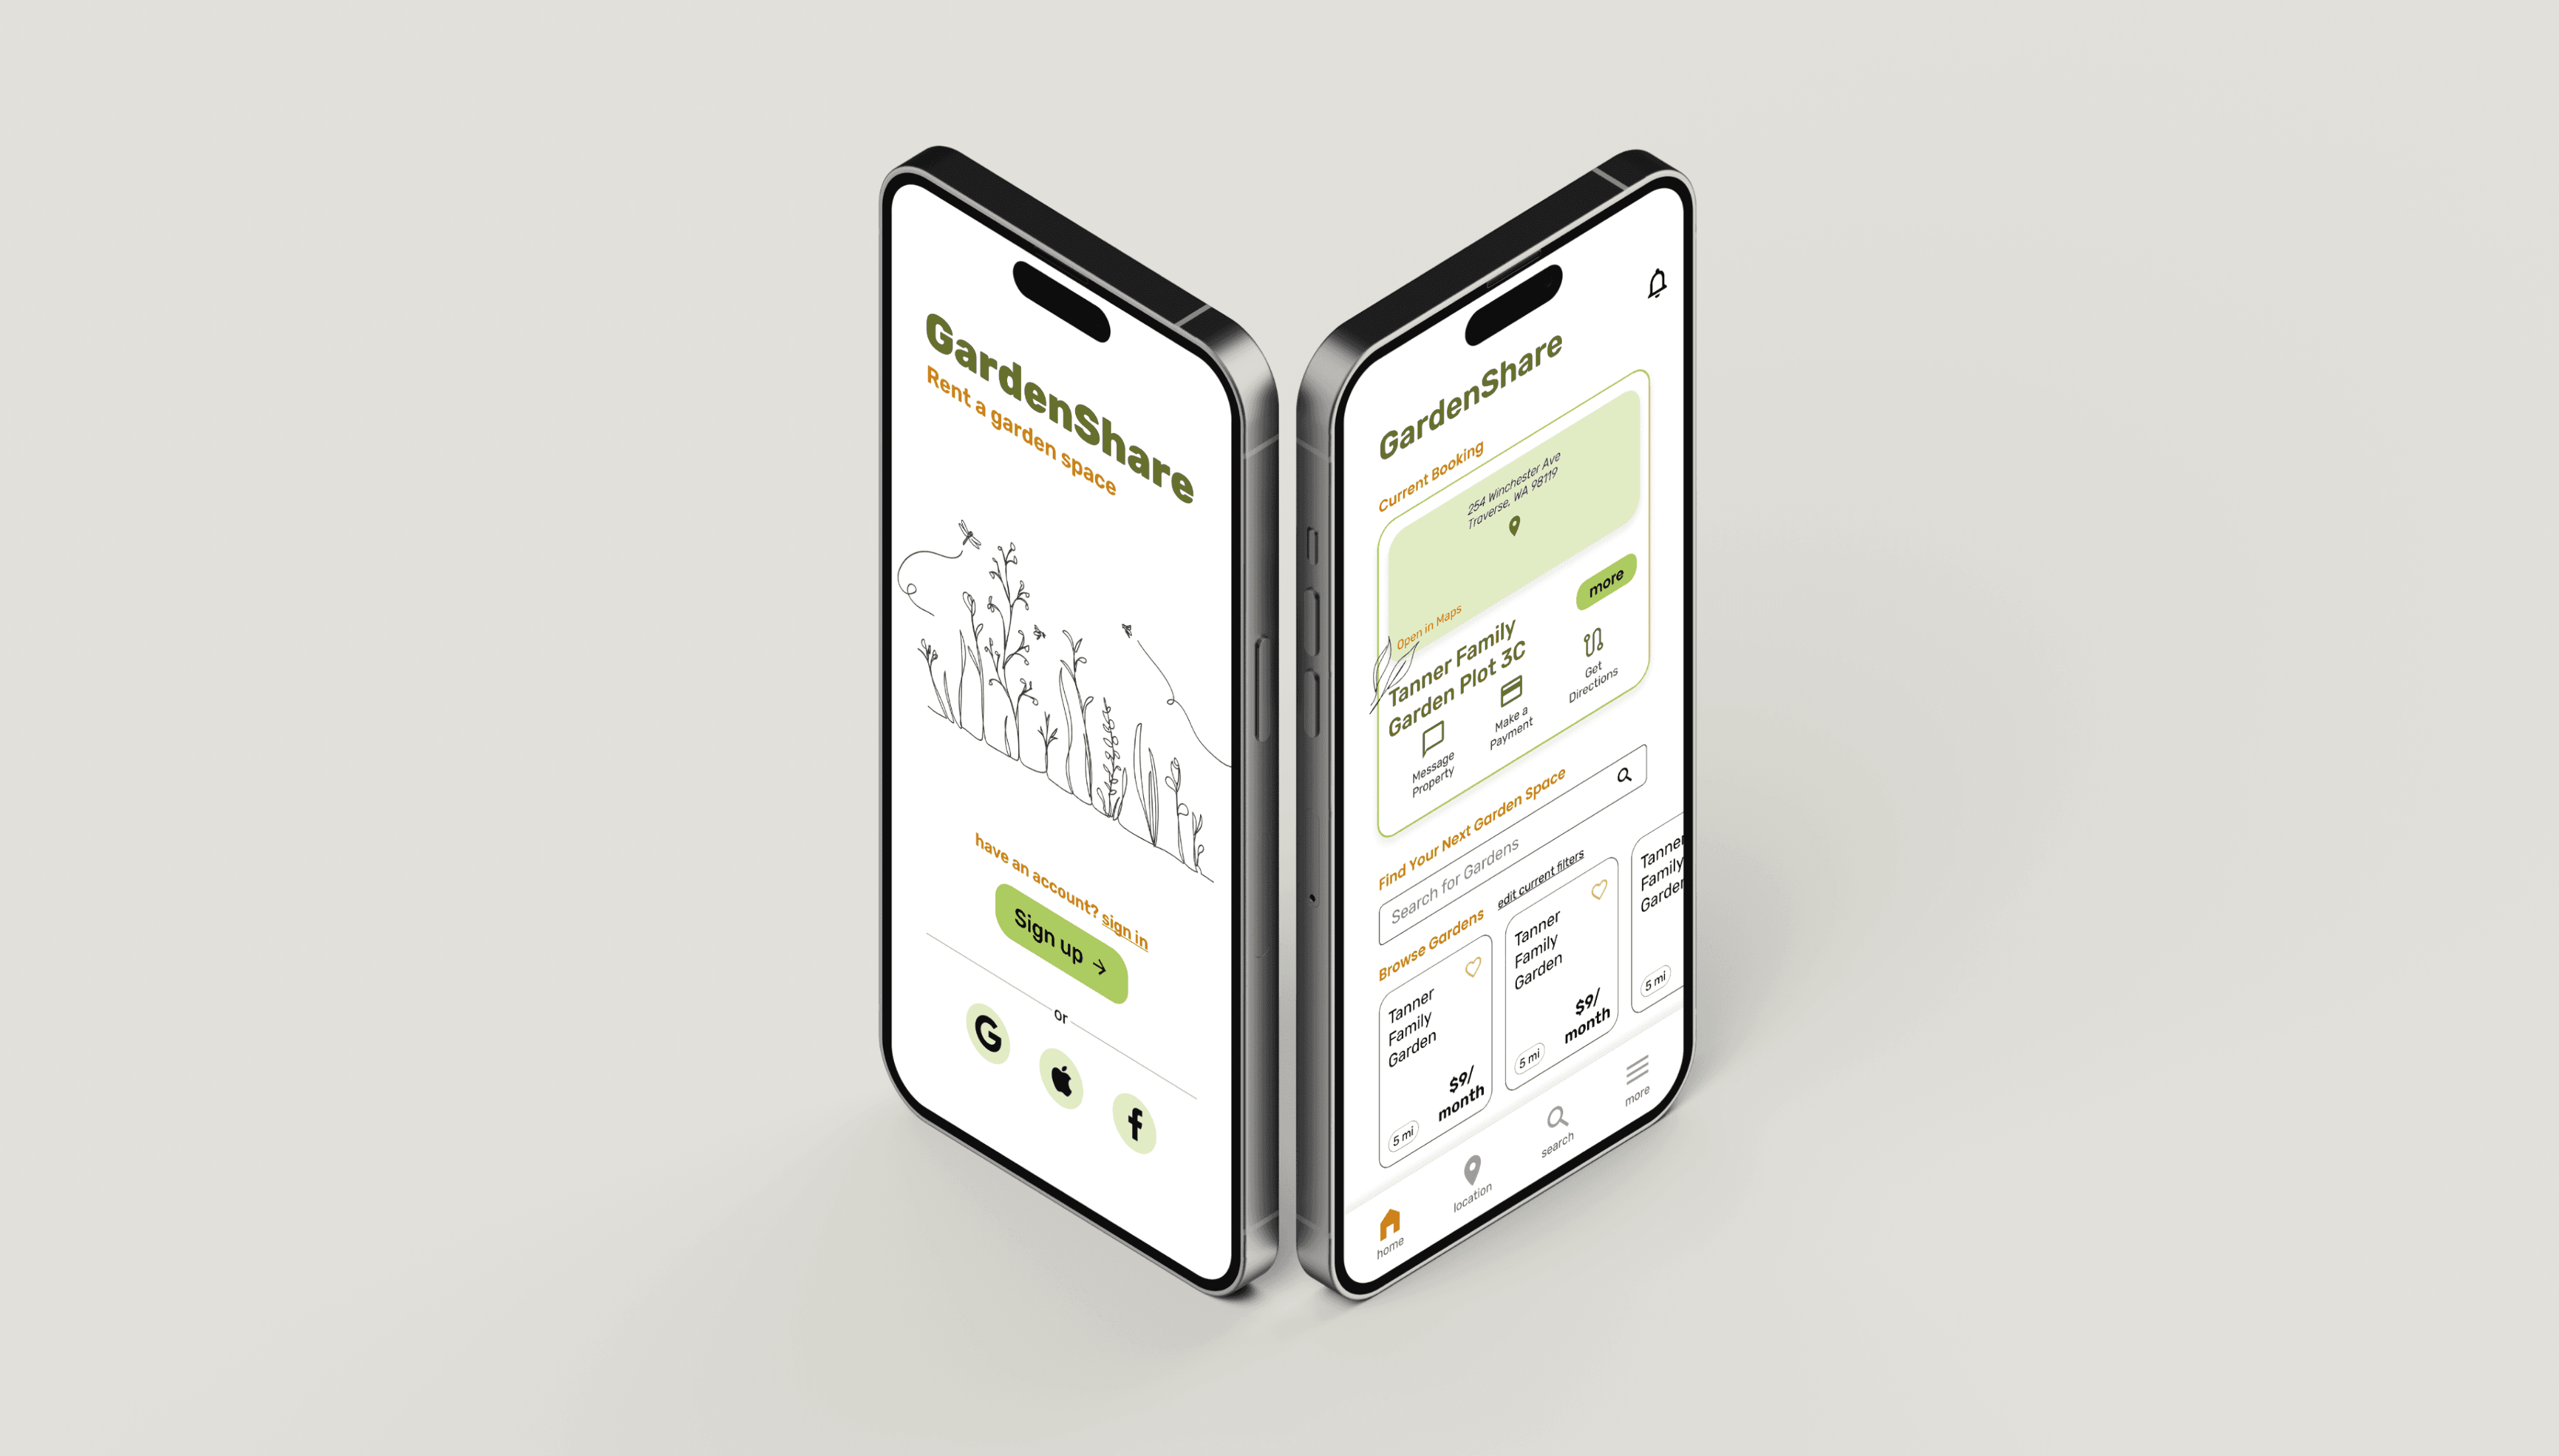
I started with the Home screen so I could create the rest based on the feel of the home screen. I tried to make the design cohesive. I am learning to add a lot of options for users to make it easy to understand and use.
Click image above to view
More Group work
Steps 1 and 3
Description
User Testing
Rough Wireframes
Individual work
Individual work
High Fidelity Wireframes
Individual work
What it is
Scenarios and Problems
Round 1 Conclusions
What I learned
What I learned
The participant is given tasks to complete and they explain what they are doing and what they are thinking in the process. It is valuable to figure out what is missing and what is needed to improve usability and experience.
For the first round of testing, the first scenario included finding a community garden specifically, and one that is more full. For this user, type of plant grown is less important than having an option for a filter that you can see only community gardens.
The second scenario had the user looking for a place on the way to work that wouldn’t need as much attention to watering.
The third scenario brought the need to see surrounding plots and what they were growing because if their peppers grew next to other peppers it would create an issue.
I need an easy way to filter what type of garden it is: community, gated, greenhouse, self-watered (irrigated), needs work, weeded and prepped, etc.
I think it would be nice to see a map of your surrounding area with all the gardens available to see the closest/most convenient options. I might add this option.
The third scenario was trickier to find an easy solution. Despite the inconvenience, the simplest option would be to contact the owner since the issue is less of a common one. Or during the booking process or on the description page there could be an option to see what others are growing in each plot.
I hadn’t wireframed my booking screen and confirmation, so these are all screens besides those. My user testing influenced how those screens came about so those will be seen later in the process.
Thoughts
What I learned
Journey mapping helped me decide more which processes need to be more clear, less painful, and even a bit fun. But it didn’t change my design much.
What I learned
The sign-in and searching process needs to be as fun and beautiful as it can so users won’t be as bothered by the process.
The journey map helps define pain points and positives so I can use that knowledge to make the experience more seamless.
Step 1: Paste a previously created Persona. We added a bit more info that helped me better understand who the personas were.
Step 2: Lens. This was the most helpful of all aside from Step 3. We discovered why they are using the app and in what context and what they are bringing to the app. It helped me define what the app needs to feature as well.
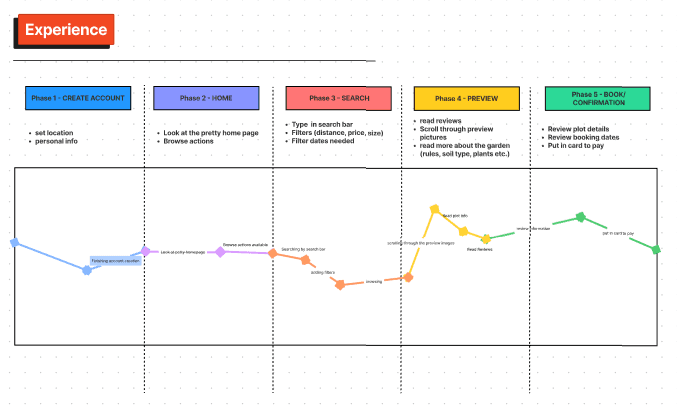
Step 3: Experience. In this we documented the process of using the app through the lens of the user. We identified pain points and the most fun parts of the process.
Step 4: Insights. My group and I wrote what I learned.
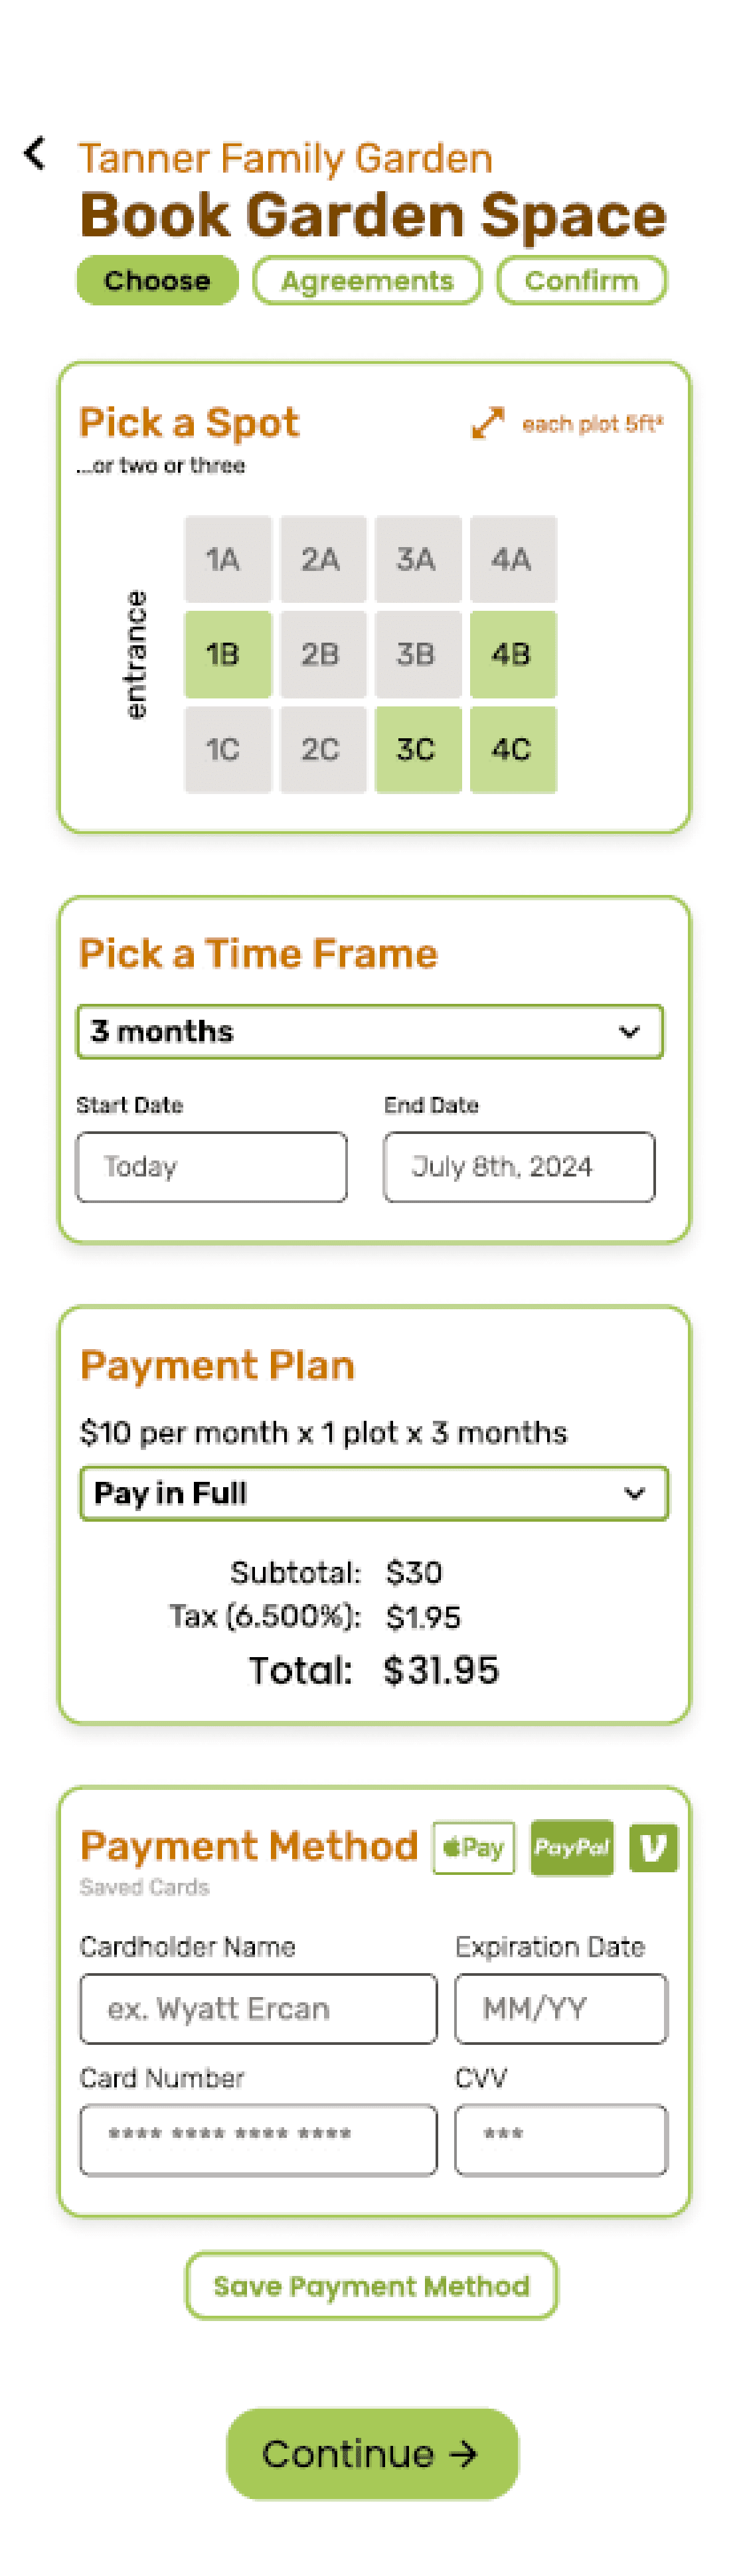
I am adding a few more options and screens to make the booking process easier for those with specific needs (which will be nearly every user).
I spent a ton of time refining my design and asking and applying feedback. At this time, however, I was still working on my illustrations. The booking page is starting to look put together along with everything else.
Adding color and interactability were the biggest goals and challenges of this part of the process.
I also added more filters to the search/filters screen and more fun interactions with sliders and hollow buttons that filled when tapped.
Hollow buttons are less impactful buttons and shouldn’t necessarily be used for aesthetics. Making pages and screens scannable became a priority in this stage as well.
Final Design
Click image above or text to view project

Illustrations created for my app. I absolutely love what they add to the design.
Screens that changed the most throughout. It was fun to see these evolve.
What I learned
I learned how to create a cohesively designed app.
Next time I’ll work on the illustrations earlier, and do more user testing through the process.
This was an entirely new experience for me, but I have been building up skills and knowledge to get to this point. I am proud of my growth and the knowledge that this app shows.
Final Thoughts

thank you!